Using Homemade Chlorophyll Water

Could homemade chlorophyll water made with spinach leaves help my clematis?
I decided I would experiment and find out.
First, let’s look at the following two definitions which explain the meaning of chlorophyll.
And the fact that chlorophyll is a result of solar energy in use is what I am hoping will help my clematis to bear flowers even though it is not getting much sun.
But first a little background. During the summer of 2010, I could not do any container gardening on my 4th-floor balcony because management had begun a major overhaul of all 30 balconies in April, and by June the work was only half done. Essentially we the tenants were left with no balconies all summer. I was very disappointed because I could not grow any veggies or plants during that summer.
Like all gardeners, I had to do some form of gardening and tried to grow at least tomatoes and my precious clematis inside my apartment. The problem was that my apartment faces north, and I had only one window facing northeast; I put the plants in front of that window but it wasn’t getting more than about 2 hours of morning sun … if that. The tomato plant didn’t last but the clematis seemed to hang on.
I was determined not to use any synthetic liquid fertilizer and every so often I would add vermicompost to the soil around the clematis. I knew that the plant needed help from the sun in order to make the necessary food that the plant needed in order to grow flowers. (See the article How Plants Grow to better understand what I mean.) Obviously, since I had very little sun, I got no flowers on my clematis.
One day in December 2010 when I happened to take out a plastic bag half filled with spinach from the fridge and noticed that most of the spinach leaves had become watery, I decided I would try making what I call homemade chlorophyll water, a method I had used rather often when I grew vegetables in my back yard.
In those days I would sometimes make my homemade chlorophyll water with alfalfa greens which I grew from seed in the fall with the intention of using it as green compost or for homemade chlorophyll water. Most of the time I used leaves from any green plant or vegetable. It worked wonders.
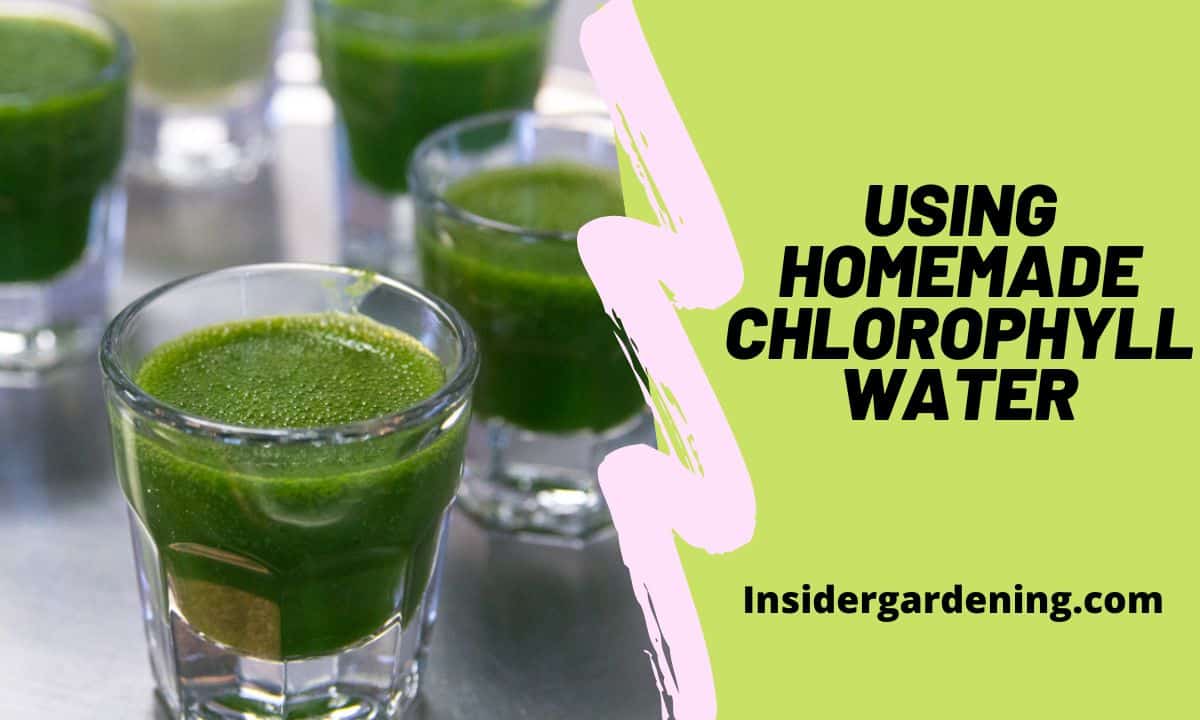
I immediately took a plastic container, emptied the half bag of spinach in it, and added water, making sure all the spinach was immersed in the water. put a cover on the container, and let it set for a few days or so. Since I knew from past experience that “homemade chlorophyll water” would smell as the leaves would break down in the water, I made sure the cover on the container was well closed.
Every day during the next 3 days or so, I would take the cover off, stir the mixture, and add water if needed. After I thought the leaves had broken down enough and the liquid had turned green, I decided it was time to pour that homemade green chlorophyll mixture around my clematis plant to see what would happen. I did not strain the water as I thought the few leaves that were left would quickly decompose in the soil.
The first step was to create a trench of about 2 inches deep around the plant about 4 to 5 inches away from the center of the plant so as not to touch much less cut or break any roots. I pushed this extra soil toward the edge of the container for now. The little trench was to force the homemade chlorophyll water to go straight down into the soil and reach the major portions of the roots.
Secondly, I took the container of homemade chlorophyll water and gently poured some of it into the trench I had made. The remaining homemade chlorophyll water was poured all over the rest of the soil which had not yet been watered.
Thirdly I pushed the soil from the edges back in place, took my watering can, and sprayed more water over the soil so that the homemade chlorophyll water would penetrate even deeper into the soil. Now I would have to wait to see if this homemade chlorophyll water would help my clematis.
January 7: Second batch of homemade chlorophyll water
All the pictures above had been taken on November 3. It was now January 7, and I had a new batch of homemade chlorophyll water which had been on my counter for about 1 1/2 weeks. This time I used more spinach leaves and the water was a nice dark green.
 On January 5, I had taken my small strainer, separated whatever spinach leaves had not completely broken down and put those in my vermicompost box, poured the liquid chlorophyll water in a jar, and placed the jar in the fridge until I was ready to use it on my clematis.
When I was ready, I mixed this homemade chlorophyll water with ordinary water so that the resulting mixture would be 50/50. I wanted enough of the mixture to also water my Christmas cactus to see if this homemade chlorophyll water would help it bloom also. (Boy, that sun is an important factor when it comes to blooming flowers, bulbs perhaps being the exception in the first year of growth).
 When I looked at my clematis, I was pleased to see a tiny hint of a flower plus a second stem growing from its roots.
I did the same thing as above: make a small trench around the root of the clematis by gently pushing the soil to the edge of the container, pour some of the mixtures into the trench and onto the root ball area to drench it, and then on the remaining sections of soil in the container. Once done, I moved the soil from the edge of the container back to its original position.
To finish, I used my watering can to sprinkle clear water all over the soil to force that chlorophyll mixture to sink into the soil so the roots could have access to it. In addition, I sprayed the leaves with water.
January 9: Decided to check the pH of the soil so that the nutrients from the homemade chlorophyll water could be absorbed by the clematis.
I first checked to see what pH was needed by a clematis in order to grow well. I found out that clematis needs a pH of anywhere from 5.5 (very acidic) to 7.0 (neutral soil).
 I got my pH tester and inserted it at different spots in the soil. The pH tester recorded somewhere between 7.2 to 7.4. It’s hard to tell exactly; however, the soil was definitely too alkaline.
I know that tea or coffee grinds were acidic but to what degree?
Again after researching, I found out that the pH of tea can be anywhere between 6.0 to 6.6. Coffee’s pH can be anywhere from 5.2 to 6.9. In both cases, the resulting pH depends on the soil which can vary quite a bit from region to region. Spinach is recognized as an alkaline food, so adding the chlorophyll water made from spinach leaves probably raised the pH to 7.2 or so which makes the soil slightly alkaline.
I’m a tea drinker who likes to save used tea grinds for plants. I allow the teabags to dry, open them up and empty the grinds into a container. These grinds can end up in the vermicompost or somewhere outside under a tree or shrub.
I happened to have about ten dry teabags, so I emptied their contents in the soil and hoped the pH would gradually come down to one that the clematis prefers. However, my tea tested at 6.8, so I will need a lot of this tea grind to counteract the current 7.2 alkalinity which is now the soil’s pH.
 I’ll have to keep adding tea or coffee grinds a little at a time until it does. It will probably take some time though for the acidity of the grinds to permeate enough to make a difference. I just have to wait and see.
The next time I make homemade chlorophyll water, I will try adding tea grinds at the same time to see whether I can bring down the pH so that I end up with homemade chlorophyll water with a pH that is neutral or slightly acidic.


